Episode 3 Event Meets State
Previously in our modernized “hello-world” example, we illustrated how to treat one of the most commonly used resources in computer programs, timers or timeout as events that can be handled in the same way as any other types of event (such as button presses). This yields a uniform software architecture called event-driven systems.
The concept of events allows us to build responsive asynchronous software. However as complexity increases, we often find ourselves handling an event differently based on conditions that depend on its execution history, i.e. what events it has handled in the past. Such conditions are likely represented by variables called flags, e.g. isStarted, isPaused, etc. Sometimes a condition depends on a logical combination of such flags, e.g. (isStarted && !isPaused).
Flags are among the first techniques we learn in programming. They are straight-forward to use and are effective for the most simple behaviors. As complexity increases, more and more flags will be added and conditions based on those flags will become exponentially more complicated. If we have one flag, there are only two possible conditions to consider (flag == true) and (flag == false). How many possible conditions are there if we have 10 flags? There are 2^10, 1024!. However, out of these 1024 conditions only a handful are relevant to the system we are modeling. It will be much easier to reason about the system if we list out those relevant conditions explicitly, rather than having them implied by variables and flags implicitly.
We call those explicit conditions states (or discrete states). Each state can be decomposed into more fine-grained states, called sub-states, repeatedly. As a result we have a tree-like structure of states starting from the root state fanning out to multiple levels of substates. We call the resulting software system a hierarchical state machine (HSM). There are a lot to learn about HSMs, from the underlying mathematical structure, software architecture and framework to design patterns, heuristics and practical examples.
Let’s begin with an example of a practical timer to illustrate how events and states work together to model a real system. This is the kind of timers you may have used on your mobile phones. You set a timeout duration after which an alert tone will be played, useful for keeping time for cooking, violin practices or helping a child brush teeth for at least two minutes!
Now let’s define the requirements:
- The default timeout duration is 2 min. A user can increase the duration in steps of 2 min by pressing Button B.
- The timeout duration is represented by the number of LEDs flashing at a rate of 1Hz. Given that there are 25 LEDs on the Micro:bit, the allowable duration is from 2 min to 50 min.
- Pressing Button A starts the timer. As it counts down, LEDs are turned on one by one.
- When the timer expires, all LEDs flashes rapidly at a rate of 5Hz for 10s serving as an alert signal.
- Pressing Button A when the timer has started resets (or cancels) the timer.
- Pressing Button B when the timer has started pauses or resumes the timer.
Defining requirements is an important first step in developing software. Sometimes they are called user stories. No matter how we call them, they specify how the system should behave and are what our software design and implementation are based on (i.e. traceable to). While each point looks simple and easy to understand, when many of them combine together it becomes very hard to visualize in our mind how the whole system works together, and convince ourselves that they indeed cover all the cases (complete) and are free of contradiction (consistent).
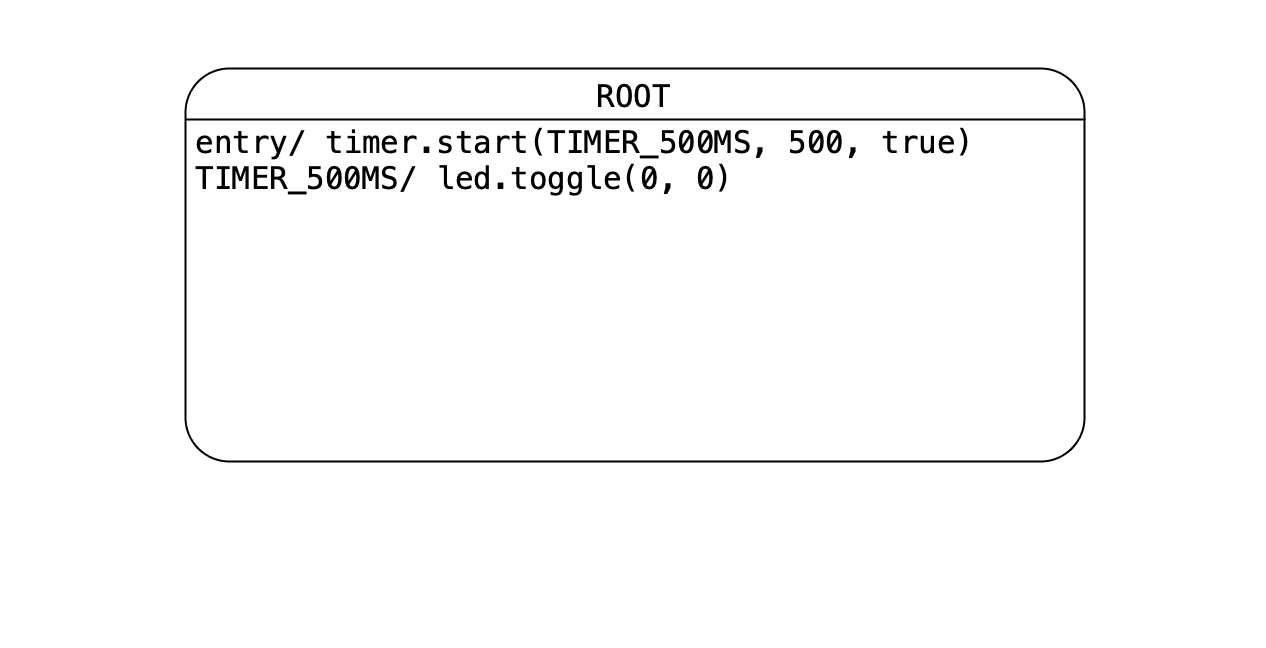
Pictures are much better in representing these knowledge and statechart is a well-established visual language for this purpose. It is so true that a picture is worth a thousand words. A statechart can easily represent more than a thousand words of your user stories. First let’s say “hello world” with the hello-world example introduced in the previous episode:
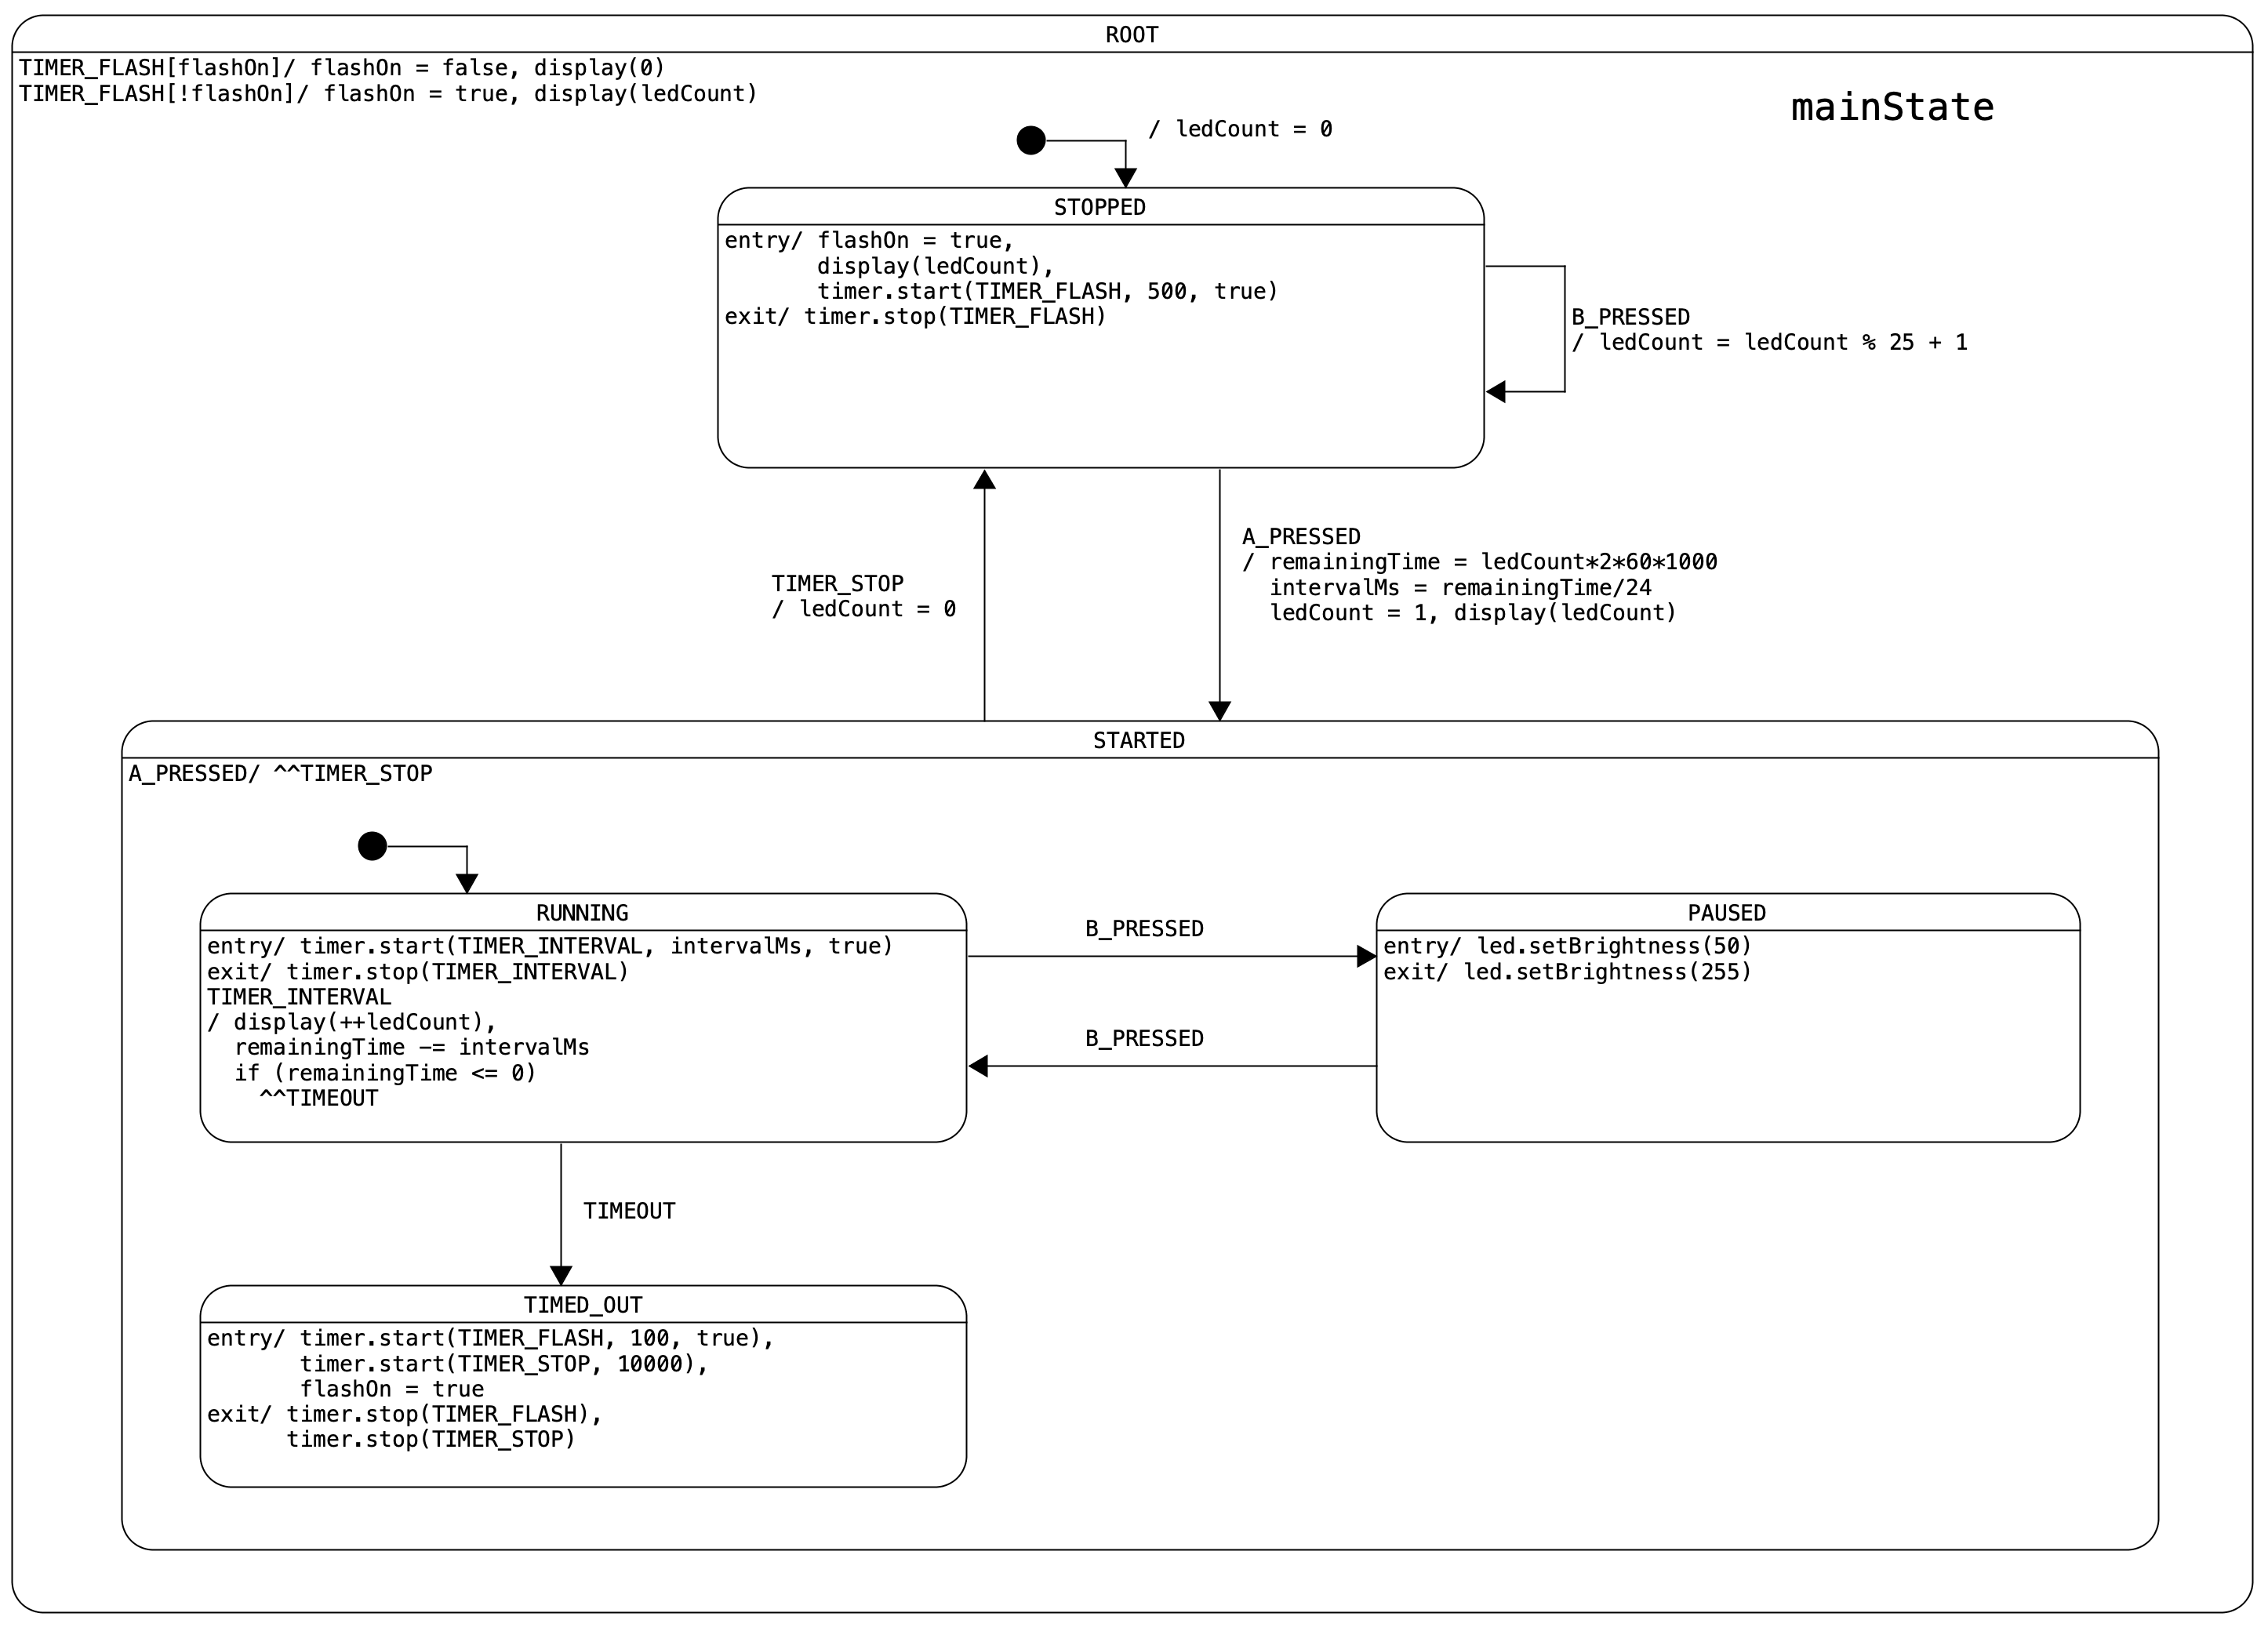
The statechart for our timer application is a little more complicated. Later on we will introduce its notation and explain the details. For now let’s get a taste of it and you may be surprised how intuitive the language of statechart is.